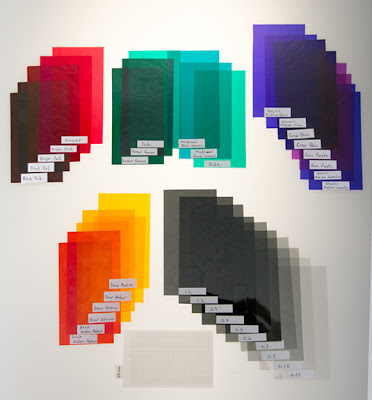
 The previous post covered the Lastolite white balance disk, a gray and white affair, but today's post will be colorful! We are going to take a look at gel filters for portable flashes and find out some ways to use them. You can see a whole set spread out in the photo above. At the bottom is the Vivitar 28mm wide-angle lens. The gels are cut from larger 8” sheets to fit the filter holder on the Vivitar 285 flashes.
For those who are unfamiliar with the term “gel,” it gets used interchangeably with color filter; they are the same thing, a thin sheet of colored material placed in front of the light source to block all but one color. The term “gel” comes from a time when these filters were made from a gelatin base material, which has since been replaced with dyed polyester and polycarbonate (see the Wikipedia for the full rundown on this).
My collection is divided between variations of reds, yellows, greens and blues. In addition there is a set of neutral density filters ranging from ½ stop up to 4 stops of light reduction (more on that later in this post). There are two of everything.
Show Me Your Colors!
 Here is my 16-color collection. You can click on the image to see a bigger size. These are sliver crops from larger images that I use as color swatches. You can see a bit of the flash at the bottom of each. I wanted each color to go from very light to dark. However, the density of some of the filters is too much for a portable flash and it was simply unable to supply enough light. Note how the Blood Red and Forest Green swatches are barely lit.
These Lee Filters and are standard Lee colors. Rosco also make similar colored filters. I am unaware of either companies product having a significant advantage over the other. These are just some colors that I thought would be useful and fun. For backgrounds I find the Medium Blue-Green gets used the most followed by Sky Blue, Congo Blue, and Jade.
I picked my filters up at LightingelStore and have found them to be reliable and well priced. There are lots of places to get color filters, including B&H, Adorama, and Amazon. Here is an interesting set
How Do They Look?
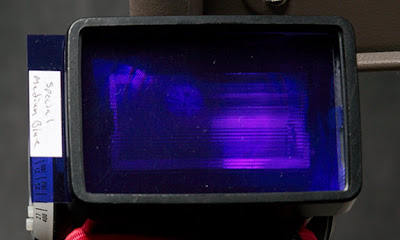 Here is the Special Medium Blue sitting in the filter holder of a 285HV flash. It isn't a tight fit, so one must be careful about flash position or it might fall out.
 Here is the resultant background from that flash with yours truly as the model. This image is a reminder why we don't just grab the first color filter we see and go with it. There is a reason for making those color swatches.
 What Else Can They Do?
So you can make pretty backgrounds for portraits using color filters, is that it?
The uses for color filters are limited only by your own imagination... No Limit! Not that I've spent all that much time dreaming up new uses, but here are a few that seemed to work out well for me.
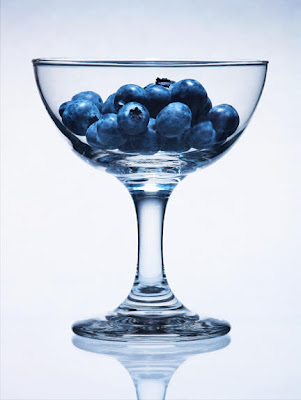 Elegantly Blueberry – A tricky subject to light using bright-field lighting with just a touch of color for the glass and background sweep. An overhead light with gobos adds accent light on the blueberries. The background gel is a fairly strong blue, but because of the intensity of the back light, it comes out as a lightly saturated blue.
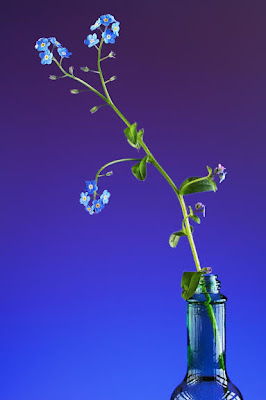 Don't Forget Me – Blue from below and red from above create a gradation that makes the tiny blue flowers pop with contrast and allow the dark green bottle to remain well defined. Note how much better the flowers at the top stand out compared with those farther down. This is due to the contrasting colors and luminosity.
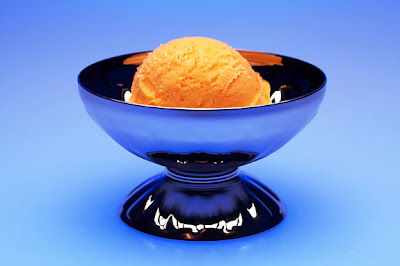 Peach Sorbet – This was shot on a translucent table with a gelled light source from below coming through the table top and a large diffused light source from above to light the sorbet. Note how the shadow from the dessert dish deepens the color at the base adding some visual interest.
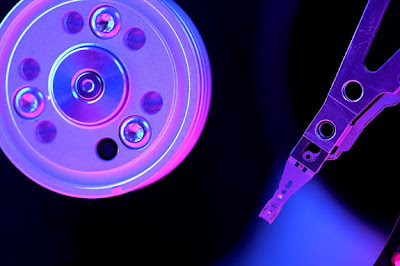 Reading & Writing – This setup depends on direct reflection from of the hard drive's mirror like disk surface to provide a splash of color near the read/write head. The platter is purely reflective, so only light sourced from within the lens's family of angles (angle of incidence) will be seen by the camera. The spindle has a more diffuse surface, so it picks up the blue and the pink, which is aimed upward from below.
I plan to incorporate color filters into more of my portraiture, including location work, as I am beginning to visualize some ways they can be used to add a bit of visual interest.
About Those Neutral Density Filters
The primary purpose of a Neutral Density (ND) Filter is to reduce the amount of light without affecting the color of the light. Regarding color influence, these filters are perfectly neutral, they merely increase the optical density of the filter material by some calibrated amount.
My collection of ND filters includes:
ND ref# Stops Attenuation factor
1.2 .... 4 .... 16
0.9 .... 3 ..... 8
0.6 .... 2 ..... 4
0.3 .... 1 ..... 2
0.15.... 0.5 ... 0.71
They got a lot of use when I was lighting with only Vivitar flashes (six at one point), especially for tabletop work, as precise light control is important. These days I am using studio lights for everything except some location work, so the ND filters are seldom used, but they are always at the ready just in case.
The reference numbers for ND filters might seem a bit strange, but is mathematically derived from d = -log 1/f, where d is the optical density and f is the attenuation factor.
What About Color Correction Filters?
The ardent student of light will note the absence of color correction filters. Color correction filters can be very useful for events and even in the studio. Every serious photographer who uses flash should have at least one CTO filter for each flash and better to have sets of partial CTO filters too.
Why would you need color correction filters? Well, if you are shooting in a place that has incandescent lights in it and you want some background light so as to include the environment, what are you going to do? If you have enough flashes you can fill the room with enough flash power to overcome ambient light, which usually looks unnatural. Alternatively you can drag the shutter enough to include the ambient light from the incandescent lighting. However, unless you want the telltale orange background that says 'I used my flash in a room lit with incandescent lights,' you need color correction filters on your flashes so they will match the ambient light. You then use a custom white balance so your subject has proper color.
For those who are unfamiliar with color correction filters, in a nutshell, they are used to match lights of different color temperatures. There are two reference filters, CTB and CTO (Color Temperature Blue & Color Temperature Orange). CTB will make a 3200K tungsten lamp match 5500K daylight, at a cost of about 2 stops of light. CTO will make daylight or a 5500K flash match a 3200K tungsten lamp, at a cost of 2/3 stop of light. To get color temperatures in between, they make ¾, ½, and ¼ CTO and CTB filters along with other variations. This is a topic for another post on another day, but I thought it worth mentioning.
Ryan Patrick O'Hara has written an excellent essay on color correction filters. Click Here to give it a read. Downloading can take awhile, so be patient. You might also want to view his interesting website. Once there, click on “Learn” to see his other articles.
You can do some cool things with correction filters. For example, you can fit the key flash with a full CTO (makes it match incandescent) and color balance to it so the subject lights correctly, but leave the background flashes unfiltered to give a high tech blue hue to the background for an environmental shot.
Coming Next
Lots more to come in this series, so keep looking for additional postings covering stuff from the bag.
Until then...
-Gene
"Westcott 43 inch Compact Convertible Umbrella"


No comments:
Post a Comment
Your comments are greatly appreciated, but please be kind. Kudos are always welcome! Please note that due to comment spamming, all comments are moderated, so it may take a little while before yours appears on the page.